Preparing a RHEL VM for a Home Lab Cloudera Cluster

In this post, I will explain how to prepare a RHEL 8.6 virtual machine (VM) for a home lab Cloudera Data Platform (CDP) cluster in a Hyper-V environment. The idea is to create a general VM that is specifically configured to run as a CDP node. Then we can duplicate it by exporting and importing it to some different virtual machines.
The new VMs should have the same configuration as the general VM. We only need to change the IP address and the hostname of the new VMs, so that they are ready to be configured as other nodes in a CDP cluster.
The CDP cluster that I will create is a lab environment. It consists of two master nodes, three worker nodes, one utility node, one edge node, and one LDAP server running Microsoft Active Directory. So, in total there are eight virtual servers. Seven of them are running RHEL 8.6. The other one is running Windows Server 2022.
Prepare the Host Machine
To run a home lab Cloudera cluster, we need a quite powerful host machine. At least we will create some virtual machines, each one with a minimal 8 GB of RAM and 4 vCPUs computing power. So, we should have at least a host machine that has 64 GB of RAM. The vCPU in Hyper-V can be shared among virtual machines, so a 12 vCPU should be enough.
In my lab configuration, I will create 8 virtual machines, each has 8 GB or RAM. The total RAM required for virtual machines are 64 GB. The host operating system which hosts Hyper-V service also needs at least 8 GB of RAM. So, I allocated 96 GB of total RAM for the host machine.
Memory
The following image shows my host machine’s memory configuration detected by hw-info:

CPU
For the CPU, I use 12th generation Intel Core i7-12700, which has 8 performance cores and 4 efficiency cores. Total thread of these cores is 20. It should be enough to run 8 virtual machines simultaneously.
The following image shows the CPU configuration detected by hw-info:

Virtual Disk Storage
For the VM disk storage, I use 1 TB M.2 NVMe SSD attached to a PCI 3.0 4x 8.0 GT/s. The following image shows the result of speed measurement using CrystalDiskMark:

Add Hyper-V Feature
Host operating system can be anything as long as it can creates and manages virtual machines. You can use Proxmox, VMware, or Windows. If you are already familiar with Windows, especially Windows 11, we can use our existing Windows 11 operating system as the host. To enable it to host virtual machines, we have to turn on Hyper-V features.
Internal Virtual Switch
After Hyper-v is installed, open the Hyper-V Manager to add an Internal virtual switch. We use Internal virtual switch because we want to be able to connect to virtual machines from host machine, but no connection can be made to the internet. This is to simulate typical Cloudera cluster in a data center where no connection to the internet can be made from the cluster.
To add an Internal virtual switch, click on the Virtual Switch Manager from the Hyper-V Manager:

Choose Internal from Create virtual switch box. After clicking OK, the Internal virtual switch should be displayed on the Virtual Switches pane.
Download RHEL 8.6 ISO Image
At the time of writing, the most recent version of RHEL is 9.2. But for the purpose of creating a home lab Cloudera cluster, we will use RHEL 8.6, as suggested by Cloudera Support Matrix.
Download the RHEL 8.6 ISO image from this page. Scroll down until you find the 8.6.0 version. Then, download the x86_64 DVD iso. Its download size is about 10.68 GB. So, if your internet connection is not fast enough, this will require quite some time.

Install and Configure the General RHEL VM
In this section we will start installing and configuring the general RHEL VM, starting from creating the virtual machine, installing RHEL 8.6 VM, and configuring all required prerequisites to prepare the VM as the general “model” that will be duplicated later.
Creating the Virtual Machine
In this section, we will create a VM from Hyper-V Manager. The outcome of this process is the initial virtual machine definition that is ready to be installed with RHEL in the next step.
Here are the step-by-step instructions to create the VM:
- Chose New > Virtual machine from the Hyper-V Manager action pane. On the Before You Begin page, click Next.
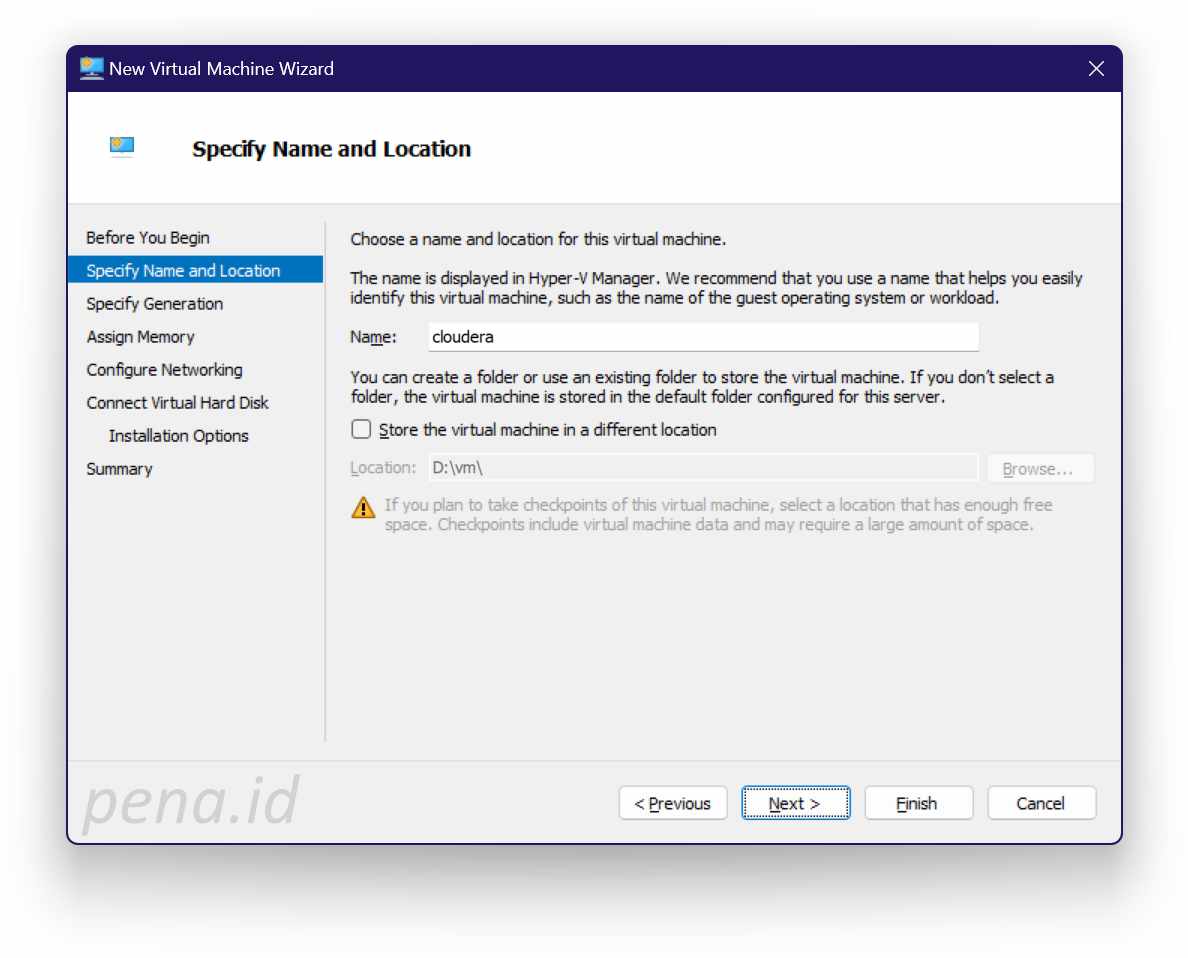
- In the Specify Name and Location page, give a general name for the virtual machine, for example: cloudera. In the Location field, specify the folder where the virtual machine will be stored, if it is different from the general setting.

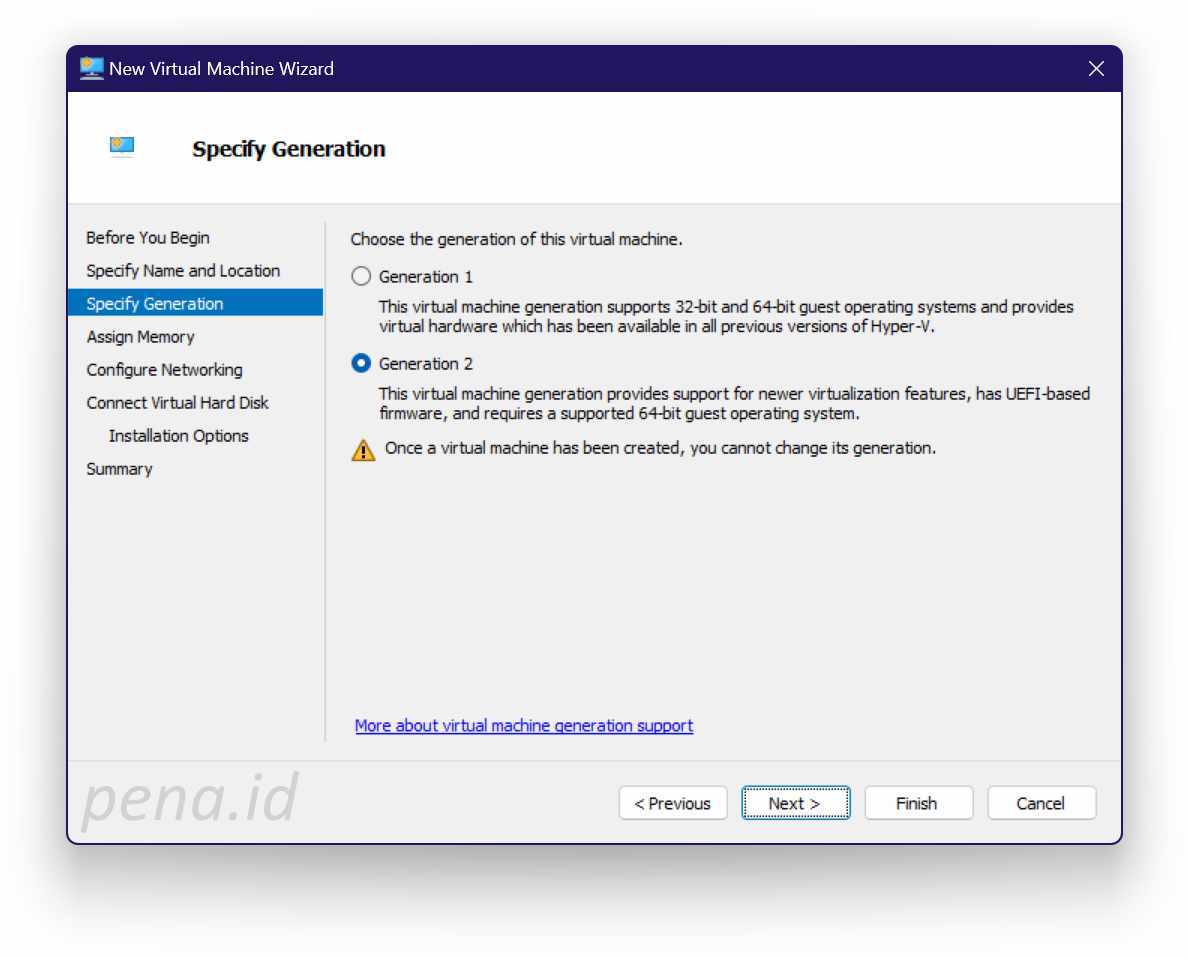
- In the Specify Generation page, choose Generation 2, as it provides support for newer virtualization features.
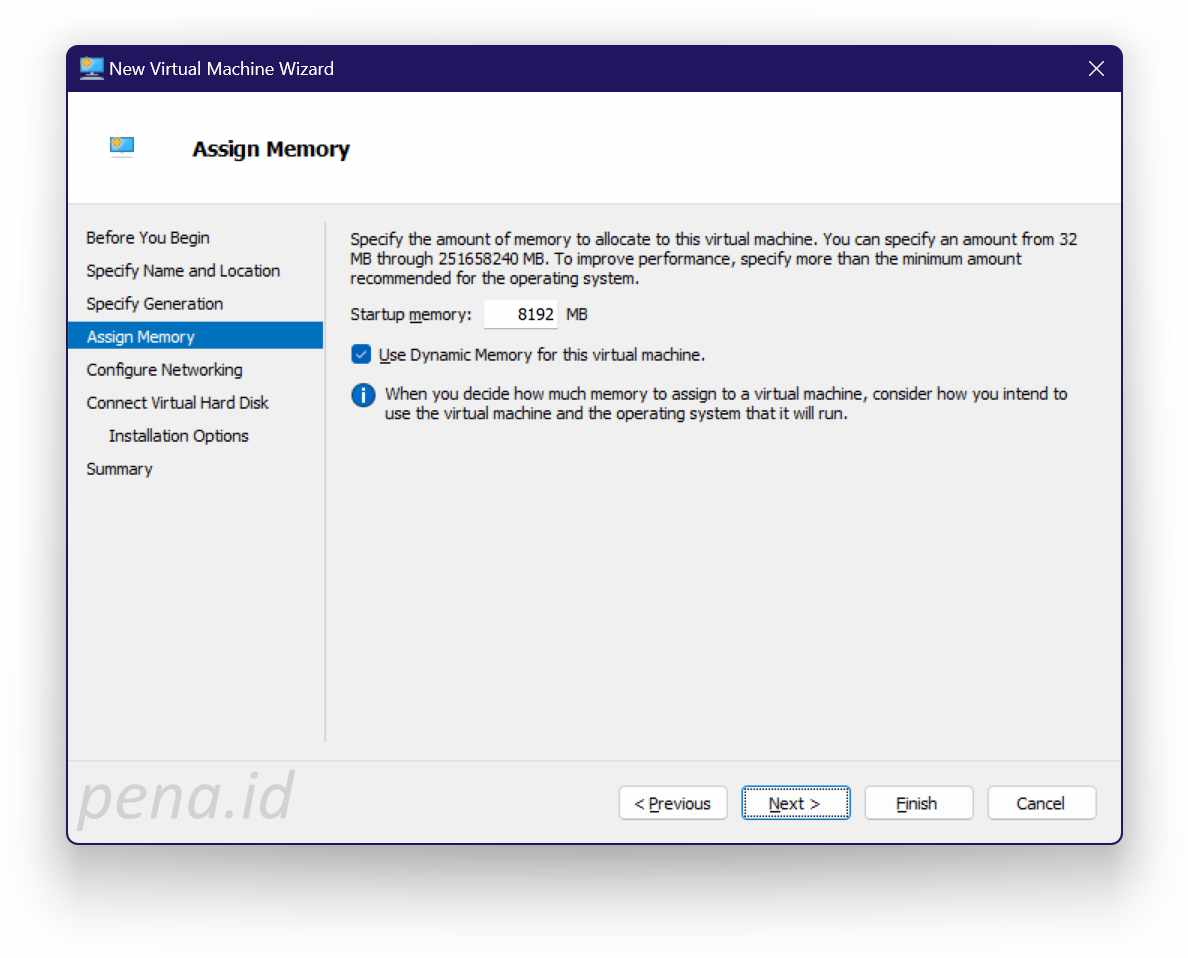
- In the Assign Memory page, put 8192 MB as the size of VM memory. Furthermore, let Use Dynamic Memory for this virtual machine checkbox checked.
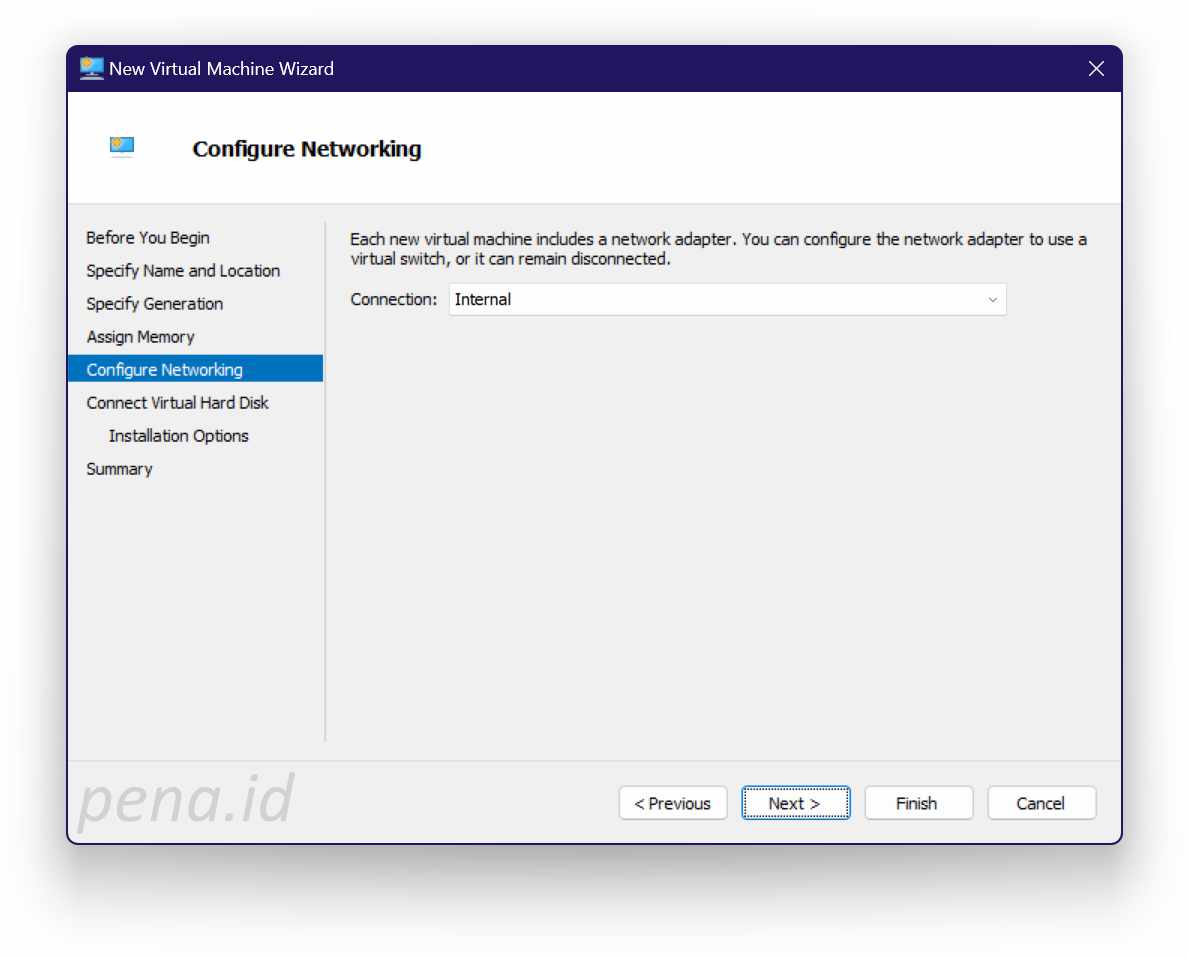
- In the Configure Networking page, choose the Internal network. If the Internal network is not listed, you have to create it first, as described in the previous section.
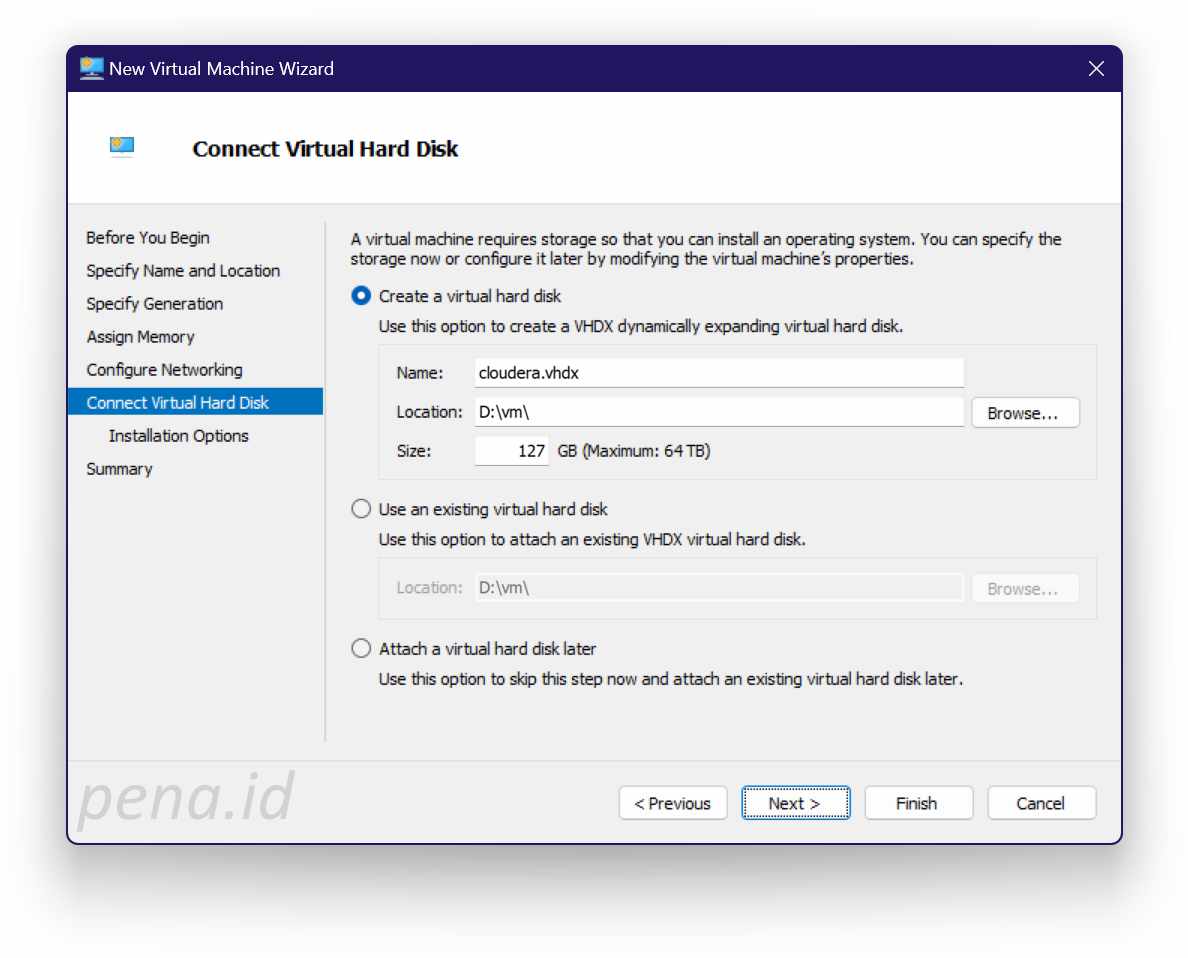
- In the Connect Virtual Hard Disk page, you can leave it as is.
- In the Installation Options page, choose Install an operating system from a bootable image file. Then click the Browse button to select the RHEL 8.6 iso image file that we previously downloaded.
- In the Summary page, click Finish. After waiting for a while, the virtual machine should have been successfully created. It should have already been listed in the Virtual Machines box of the Hyper-V Manager.
- In the Virtual Machines box, right click on the virtual machine name, then choose Settings.
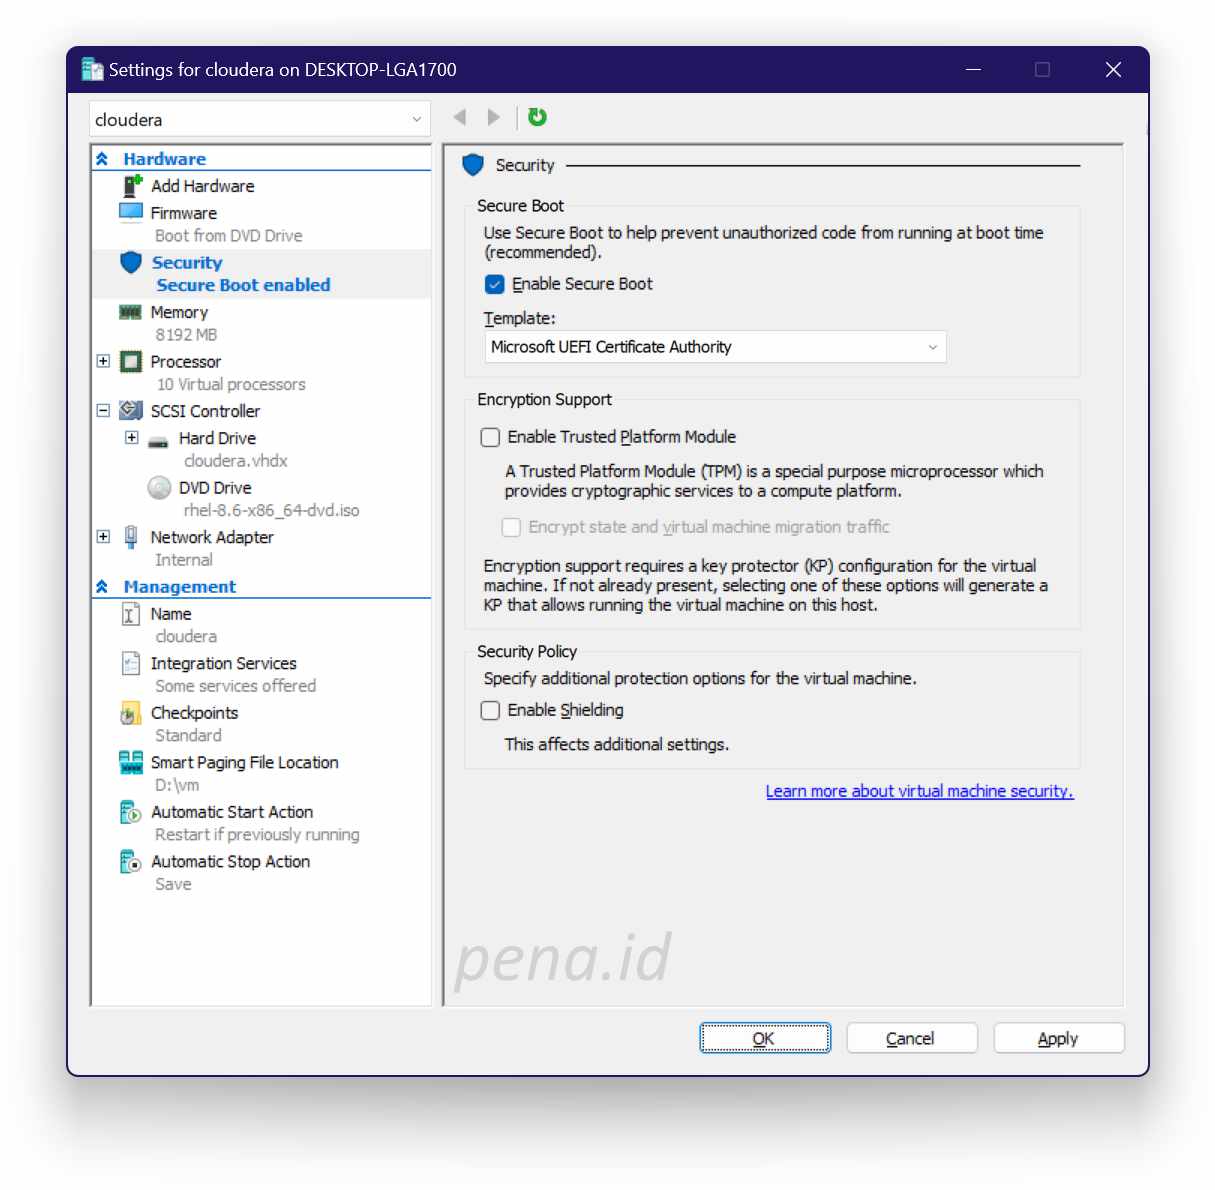
- In the Settings left pane, choose the Security to change the Secure Boot template from Microsoft Windows to Microsoft UEFI Certificate Authority, as suggested by this reference.

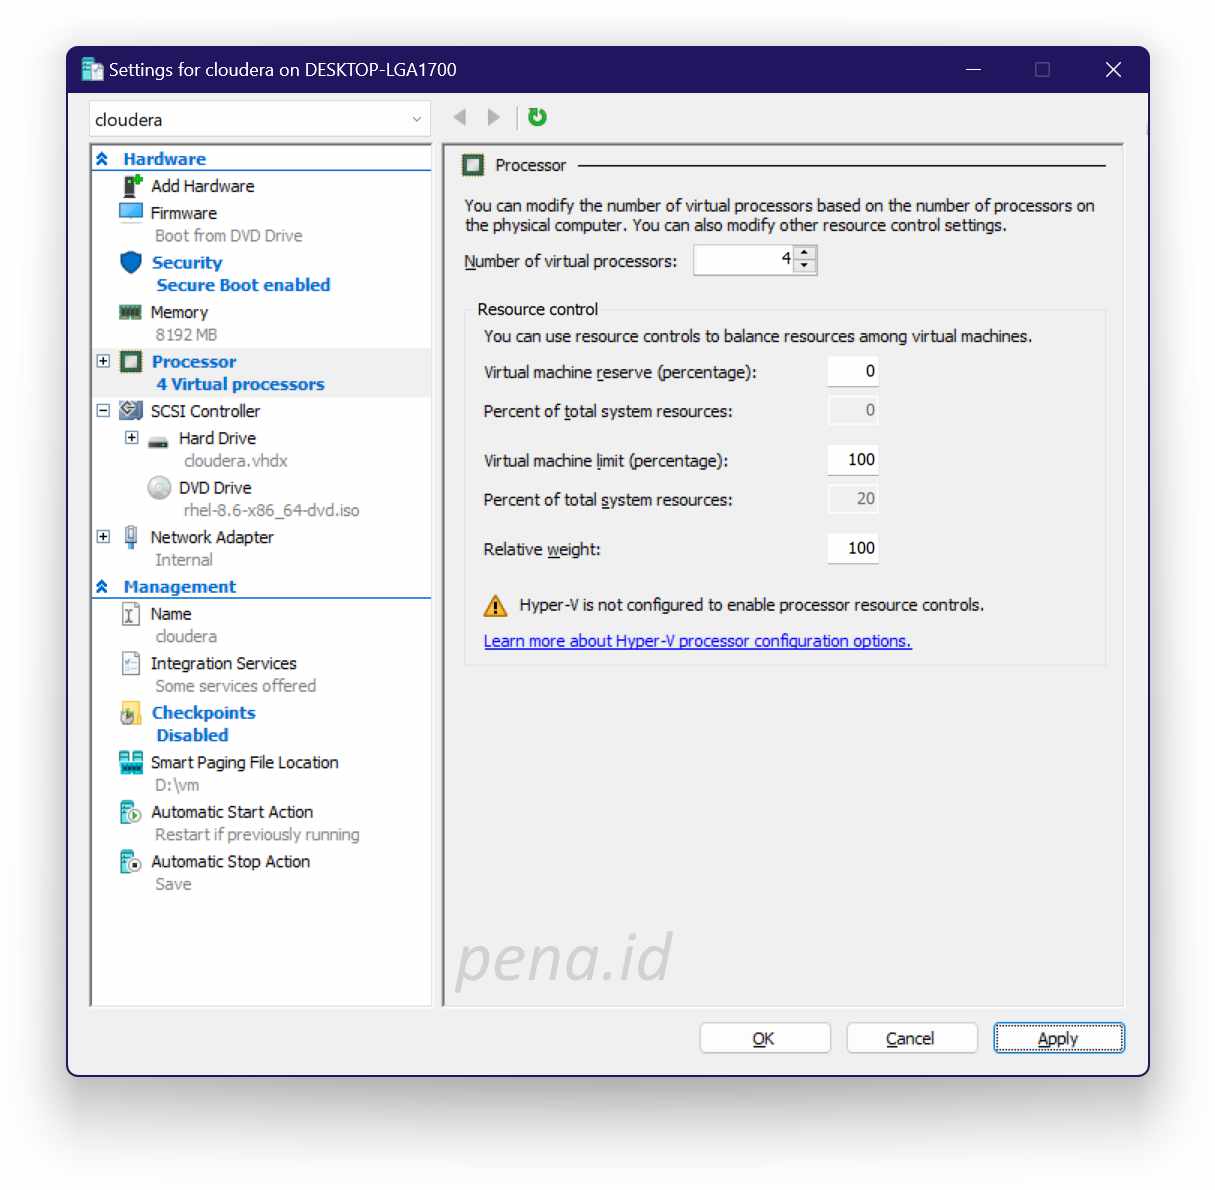
- In the Settings left pane, choose Processor. Then, change the Number of virtual processors from 10 to 4.

- Click the OK button to apply the changes we have made to the virtual machine.
- Now we can Connect to the virtual machine. Then, on the virtual machine’s console, press the Start button to begin RHEL 8.6 installation.

Installing RHEL 8.6 VM
This section focuses on installation of RHEL 8.6 VM. The end result is the running RHEL 8.6 server operating system on top of Hyper-V.
Follow these steps to installing RHEL 8.6 VM:
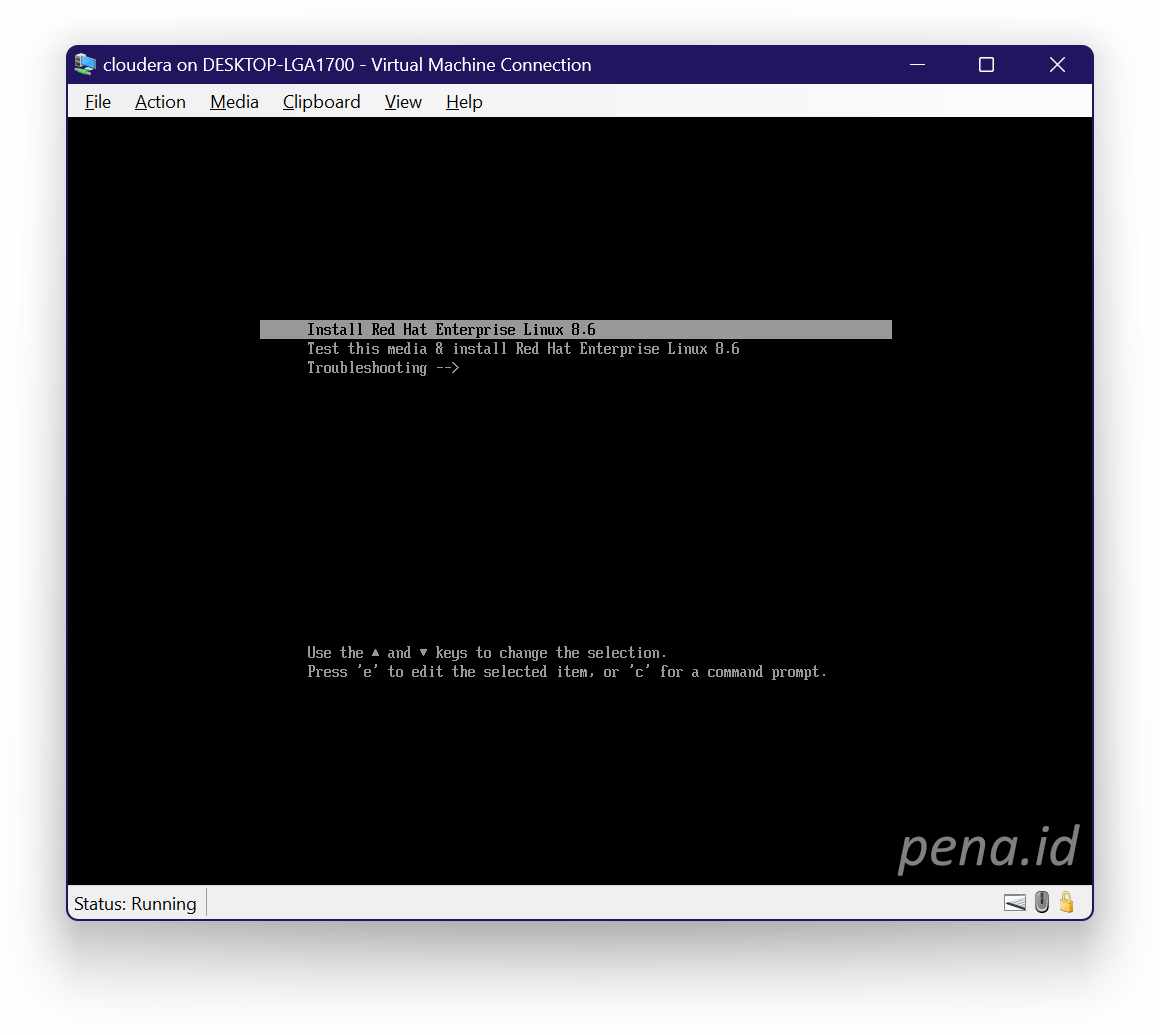
- In the first page of installation steps, choose Install Red Hat Enterprise Linux 8.6.

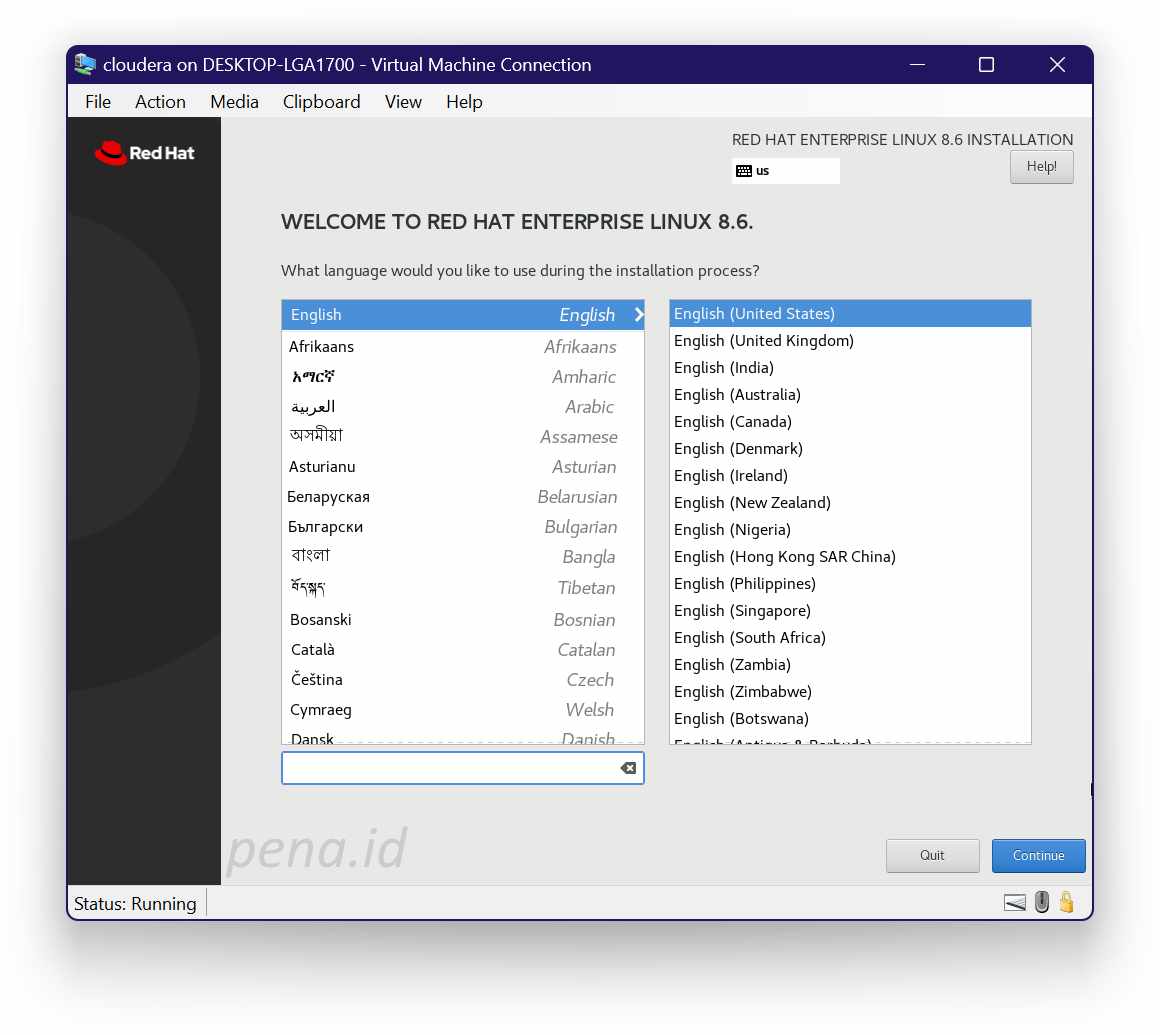
- In the Welcome page, choose the installation language. Then, click Continue.
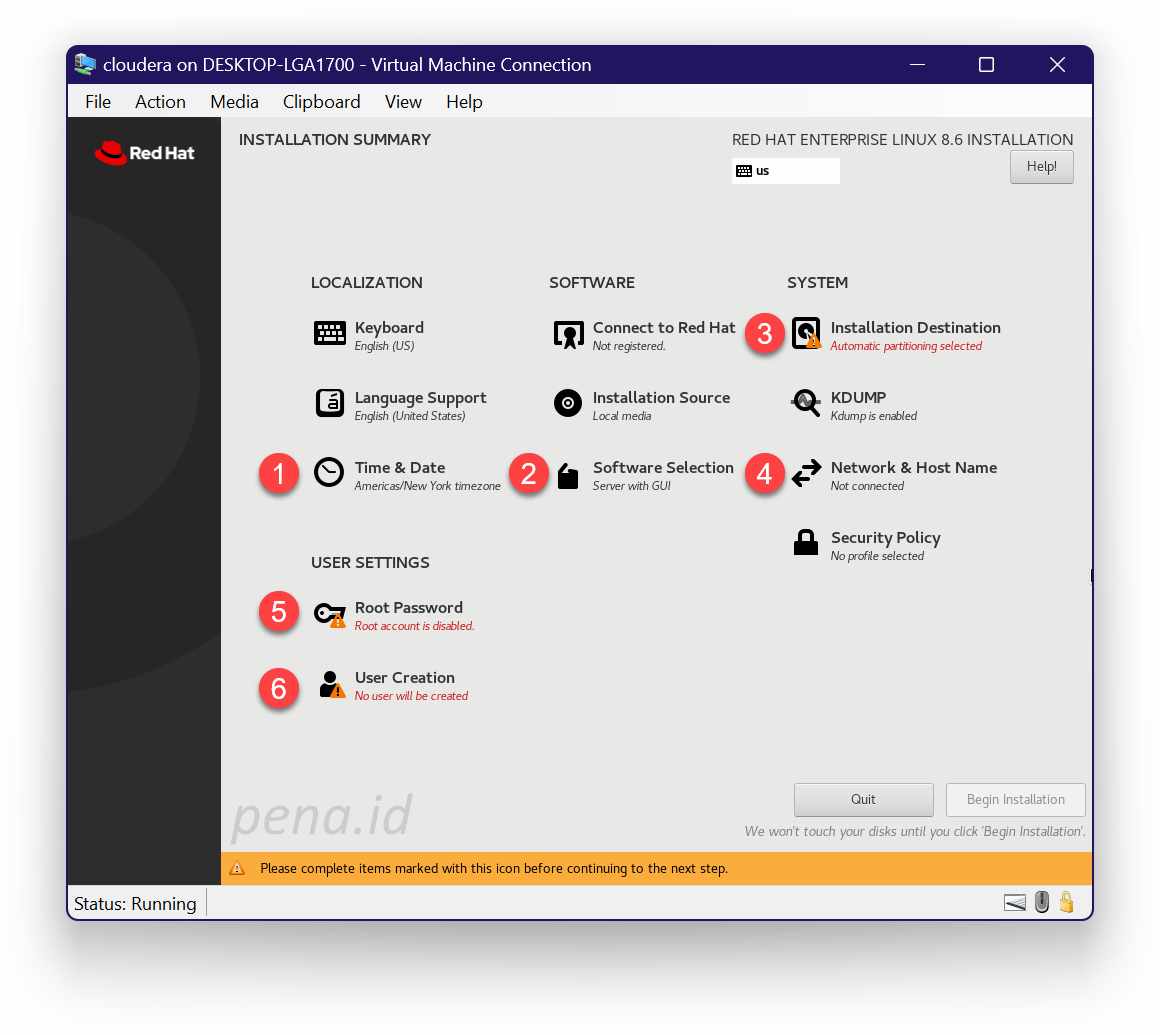
- In the Installation Summary page, there are several things that we will configure. To clarify, I marked the items that need attention with red circled step numbers from 1 to 6.
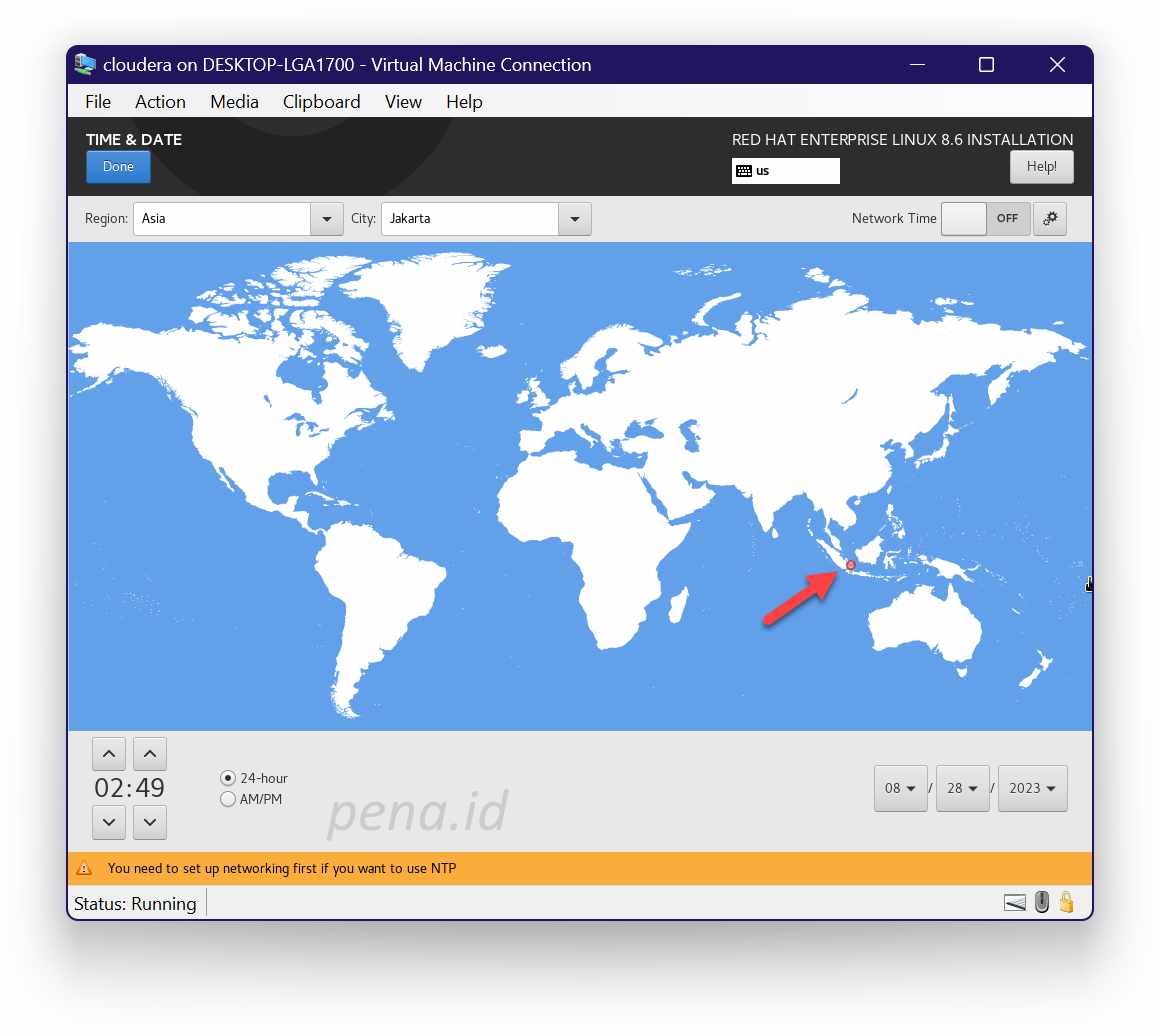
- The first step is configuring the Time & Date. Choose appropriate date, time, and time zone based on your location. Then, click Done.
- The second step is Software Selection. Choose Server (without GUI). Then click Done.
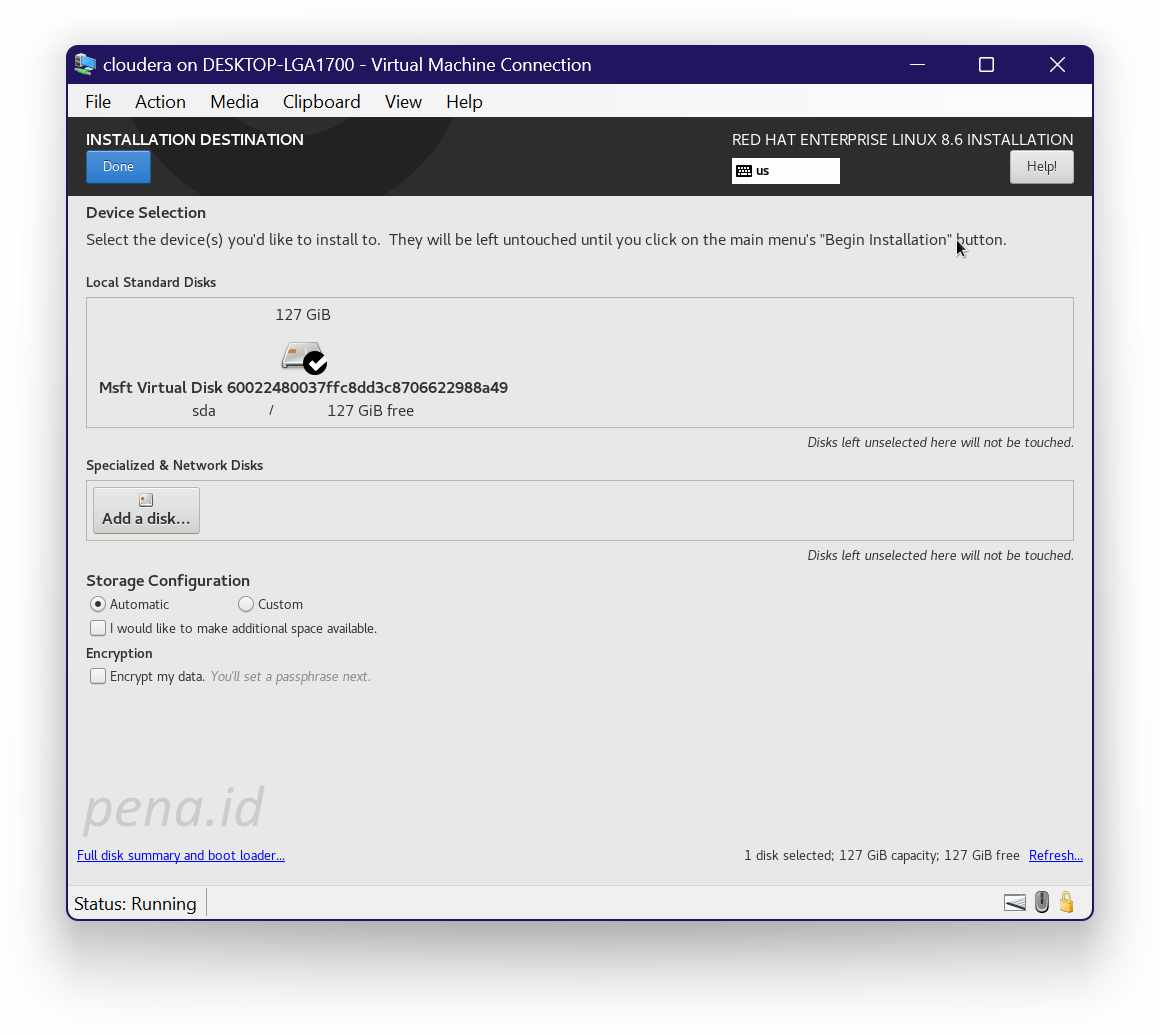
- The third step is Installation Destination. Choose automatic storage configuration. After that, click Done.
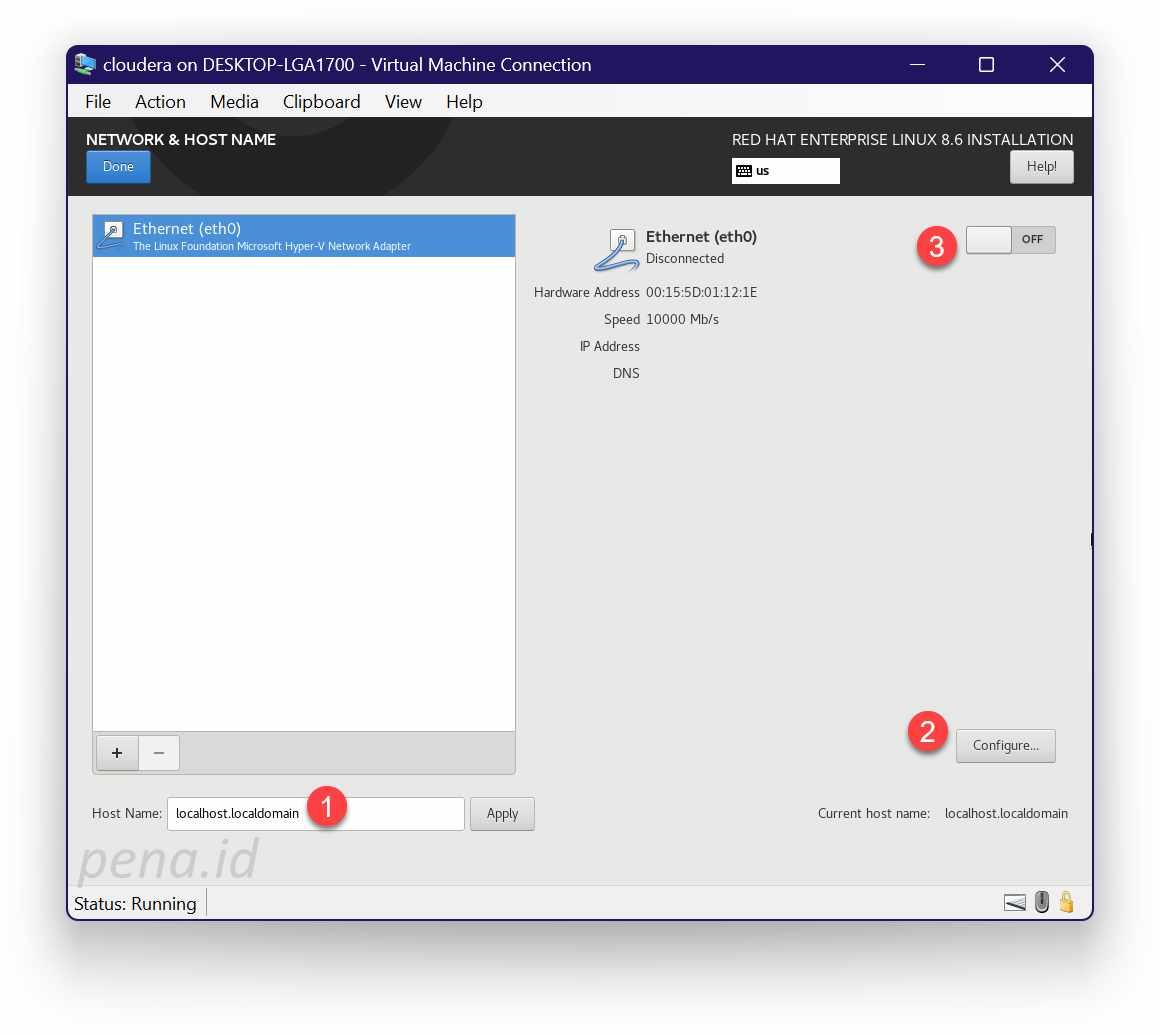
- The fourth step is Network & Hostname. Let the default hostname (1) intact because we will change the hostname later. However, we need to enter the IP address. Click on the Configure button (2). When done, turn on the network (3), and then click Done.
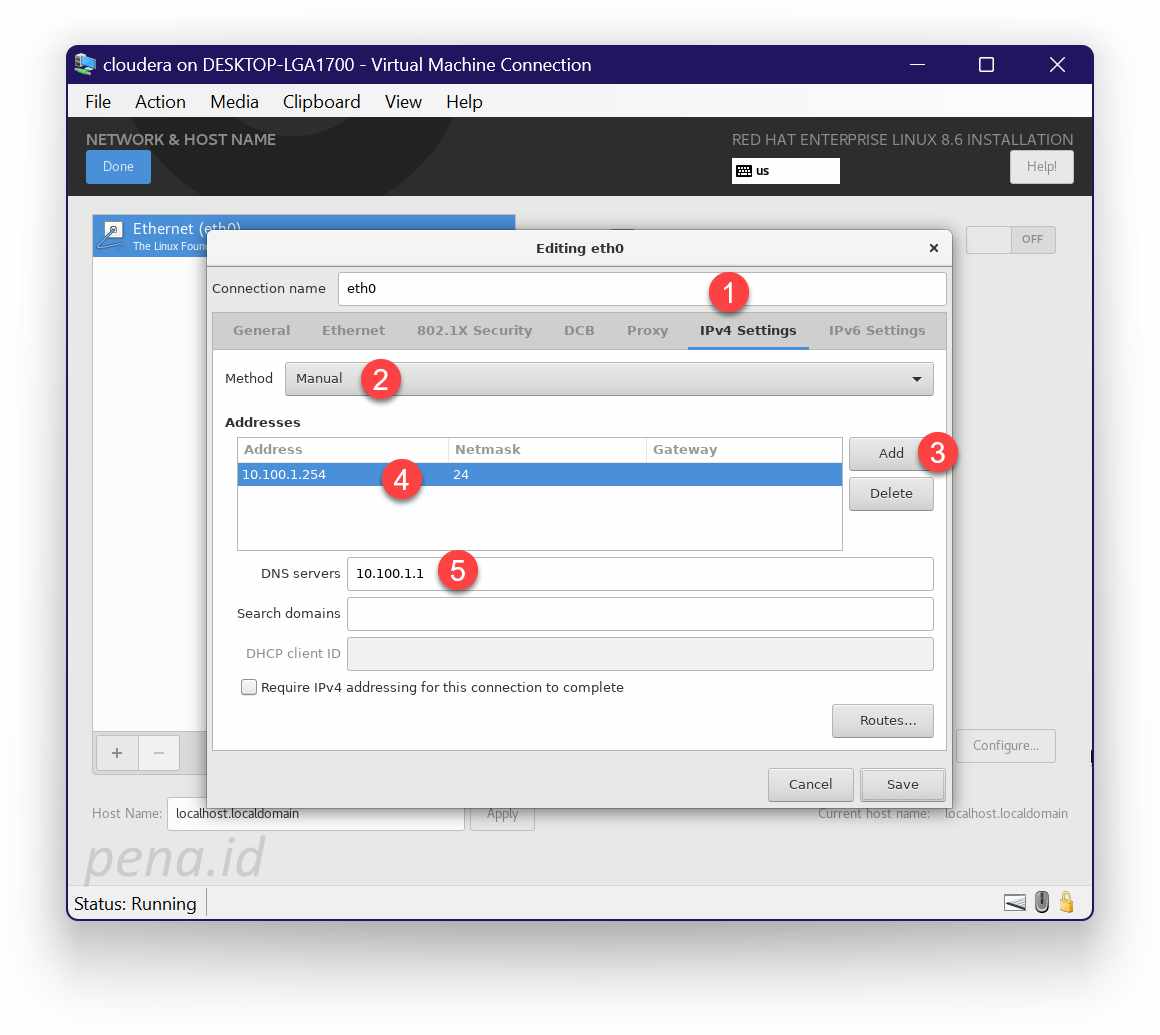
- In the Editing eth0 dialog, we will configure the network. Firstly, click on the IPv4 Settings tab. Secondly, change the method to Manual. Thirdly, click on the Add button, and then put 10.100.1.100 as the Address and 24 as the Netmask. Let the gateway empty because this server will not connect to the internet or other network. Lastly, put 10.100.1.1 as the DNS server because we will create a DNS server there. Then, click Save.
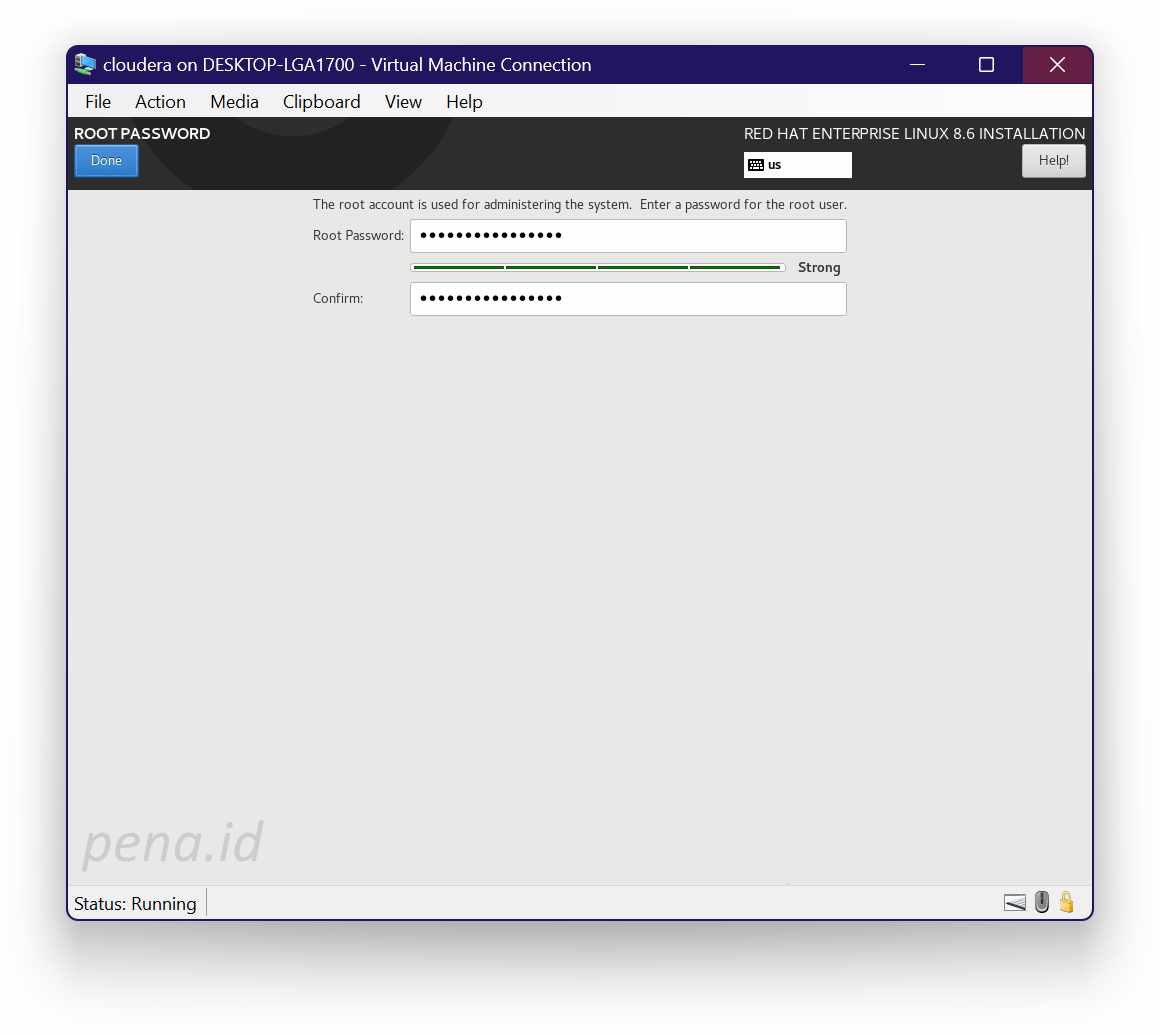
- The fifth step is Root Password. Specify a strong password for the root account. Then, click Done.
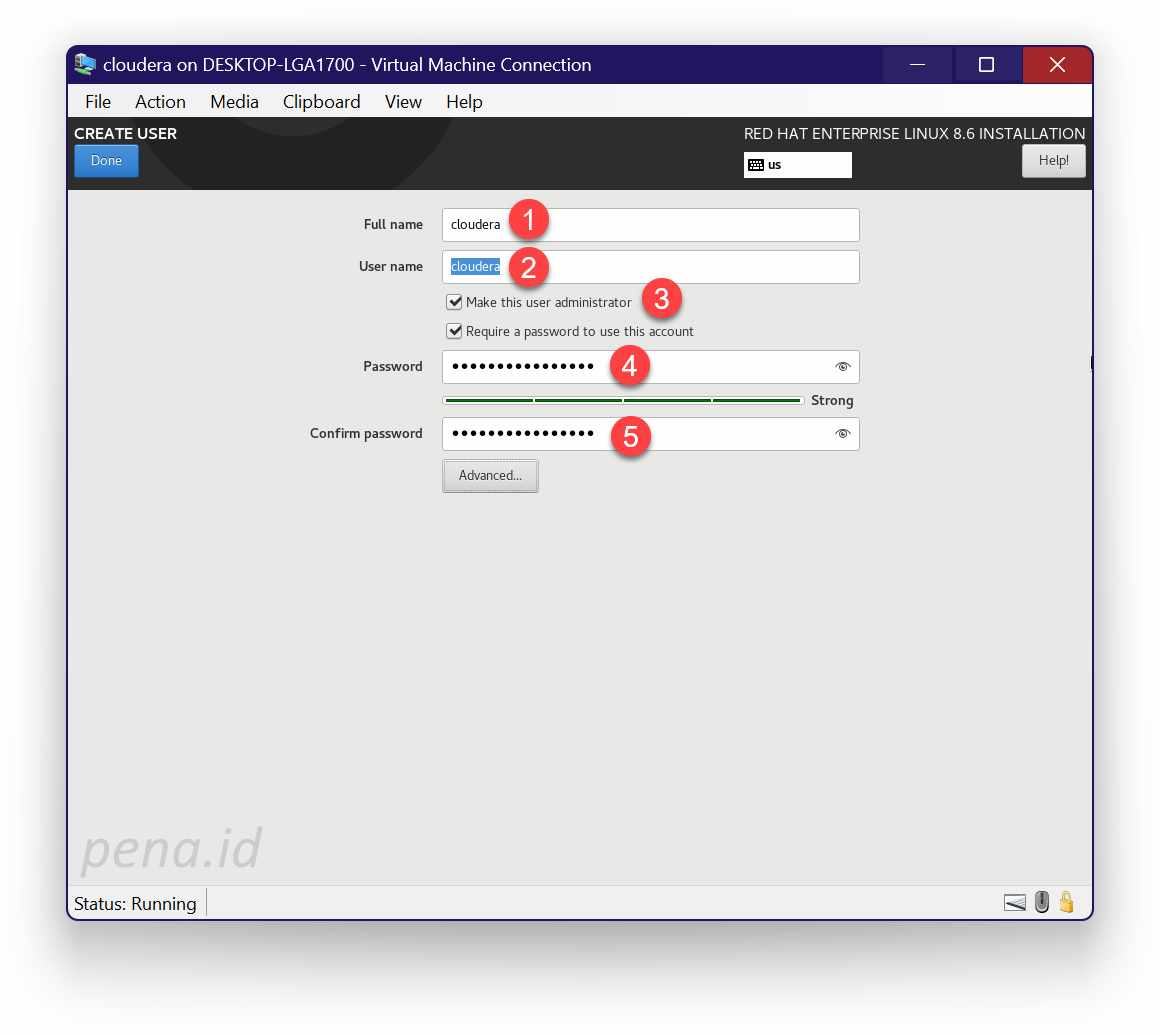
- The final step is User Creation. Create a user called cloudera, who has administrator privileges. Firstly, specify Full name. Secondly, specify User name. Thirdly, check on the Make this user administrator. Finally, give the user a strong password. Then, click Done.

In the Installation Summary, click the Begin Installation button to start the installation. The installation process should require no more than 10 minutes. When done, reboot the VM to login.

Conclusion
In this post, I’ve explained how to prepare a RHEL 8.6 VM for a home lab Cloudera cluster in a Hyper-V environment, from preparing the host machine, adding Hyper-V features in the host machine, downloading RHEL 8.6 ISO image, and finally installing and configuring the general RHEL VM. Next post will install all prerequisite OS packages and configure OS services required by a Cloudera node.

An IT project manager who also passionate in smart home ecosystem. I live in Jakarta, Indonesia. I have a bachelor degree (S.T.) from Teknik Informatika Institut Teknologi Bandung (ITB) class of 1994, and a master degree (M.T.I.) from Magister Teknologi Informasi Universitas Indonesia (UI) class of 2018. I also have a Project Management Professional (PMP®) certificate from Project Management Institute, and a Microsoft Certified Trainer (MCT®) from Microsoft.
- Preparing a RHEL VM for a Home Lab Cloudera Cluster August 27, 2023
- Configuring Jellyfin Media Server August 22, 2023
- Configuring Frigate NVR: An Open Source IP Camera Recording with Object Detection Solution August 16, 2023
- Creating a Secure Tunnel for Home Assistant August 12, 2023
- Installing and Configuring Home Assistant Stack on Docker Ubuntu Server 22.04 August 9, 2023